
Words & Pics by Pete Vickerstaff.
This is a guide on how to fit the OE rear mud flaps to an MG TF.
Look out for the
![]() to
indicate tips along the way. This guide covers fitting of the drivers side rear
mud flap.
to
indicate tips along the way. This guide covers fitting of the drivers side rear
mud flap.
The instructions say that all you need is a Phillips screwdriver to fit the mud flaps, well maybe, you’ll see as the story unfolds…………
|
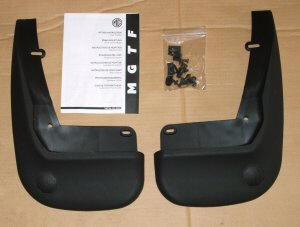
1. Included in the kit are the ‘instructions’, two mud flaps
(obviously!), and a fitting kit comprising of 4 spring clips, 4 plastic
plugs and screws, and 4 self tapping screws. |
 |
|
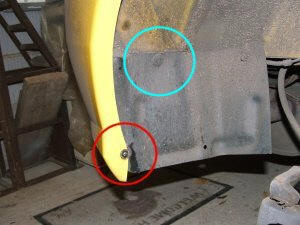
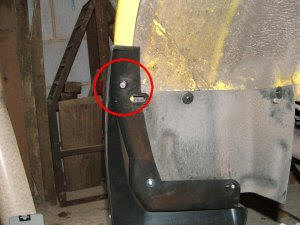
2. First step is to remove the road wheel, giving access to the
small wheel arch liner at the rear of the arch. Remove the
self-tapper at the bottom of the wheel arch (circled in red)
|
 |
| 3. So having removed both plastic plugs, the liner comes away, but is still attached to the exhaust sensor cable, so be careful. |
 |
|
4. A spring clip should now be attached to the upper outer hole of
the liner.
|
 |
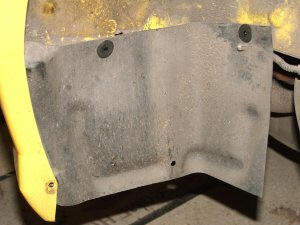
| 5. This was where the fun began. The next step is to re-fit the liner. It was obvious when I had done this that the upper outer hole was not going to line up with the hole in the mud flap, forcing it deformed the liner and mud flap (circled in red). |
 |
|
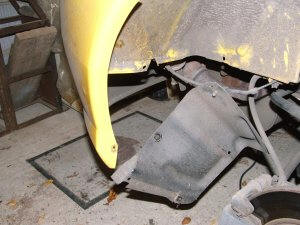
Looking at the other side I could see that the drivers side
liner was either misshapen or was not the right one !!!. Look at
the picture and you can see the lip of the arch blinds the upper
outer hole.
|
 |
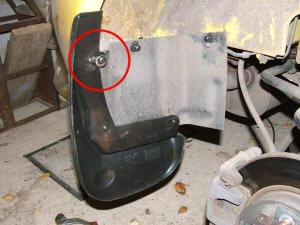
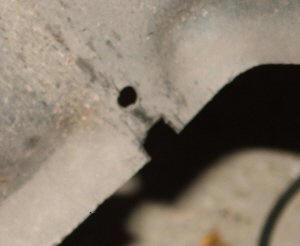
| 6. I decided to fit a spring clip and self tapper to the bottom right hole, and a small SS bolt above the upper outer hole. To get the spring clip to fit, I had to cut out a bit of the liner, see the picture. |
 |
|
7. All that needs doing now is to re-fit the liner using the plastic
plugs and screws to the top holes. Offer up the mud flap and fit the
bottom outer self tapper.
Fit a self tapper to the bottom right hole and into the spring clip
of the liner (the instructions indicate that a plastic plug and
screw should be used here, but I’d used the ones supplied in the two
upper holes, I also felt that the self tapper was more secure).
|
|
|
I then drilled thru the mud flap and the lip of the bumper arch, for
a small SS nut and bolt (circled in red), although a self tapper and
spring clip would probably also work. This had the effect of pulling
the mud flap onto the bumper to give a better fit.
|
 |
|
|
|
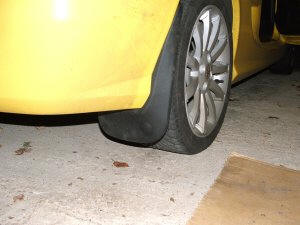
| 8. And that’s it, job done (apart from re-fitting the road wheel of course). Sit back and admire your handy work, before embarking on the fitting the other side. |
 |