
This how to guide covers the installation of the Mike Satur TF Spring and Shocker kit (blue).
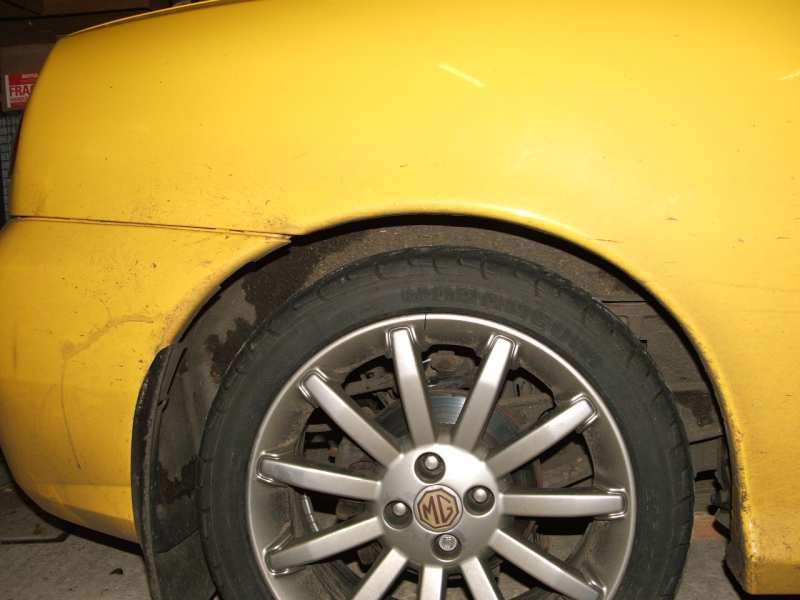
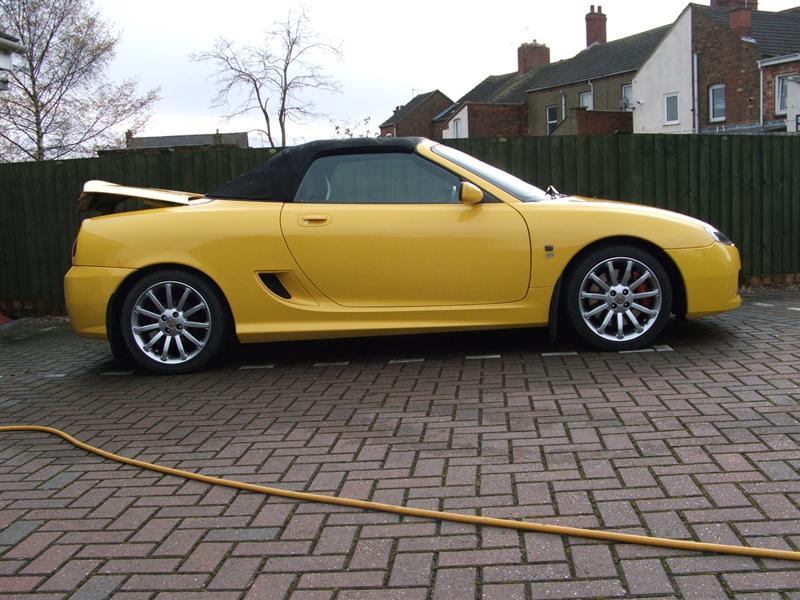
Firstly some before and after photos (apologies for the filthy state of my car!!)......
before......
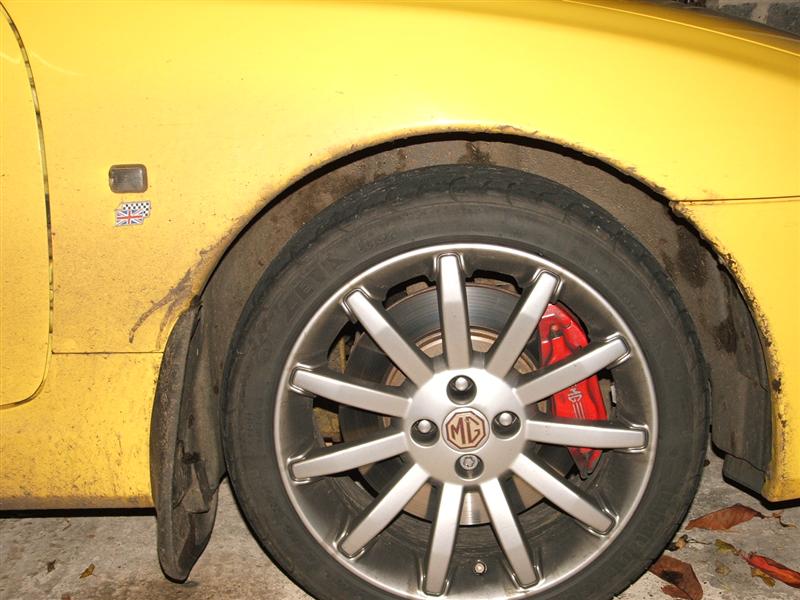
after........
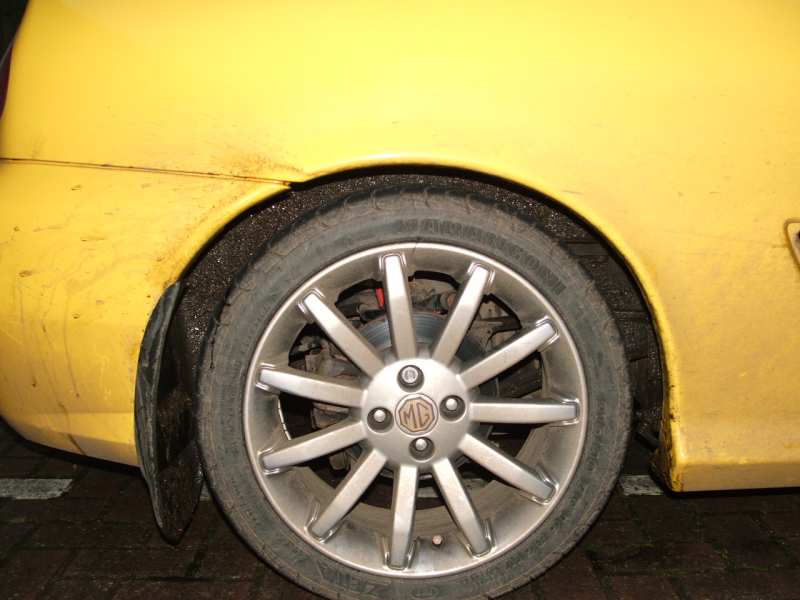

 <<-- now its clean !!!
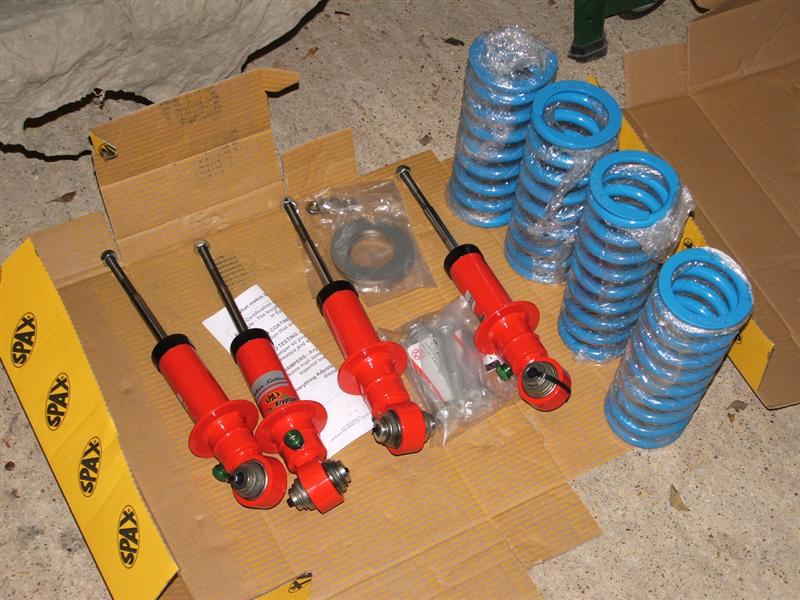
This is the kit supplied by Mike Satur
 , it
includes four bottom bolts, four spring retaining nuts and four plates that
increase the spring seat area. The springs are marked on the ends F and R, but
the rears are the shorter pair. The Spax dampers come in boxes also marked front
and rear, altho I added an F and R to them with a permanent marker, just in
case.
, it
includes four bottom bolts, four spring retaining nuts and four plates that
increase the spring seat area. The springs are marked on the ends F and R, but
the rears are the shorter pair. The Spax dampers come in boxes also marked front
and rear, altho I added an F and R to them with a permanent marker, just in
case.
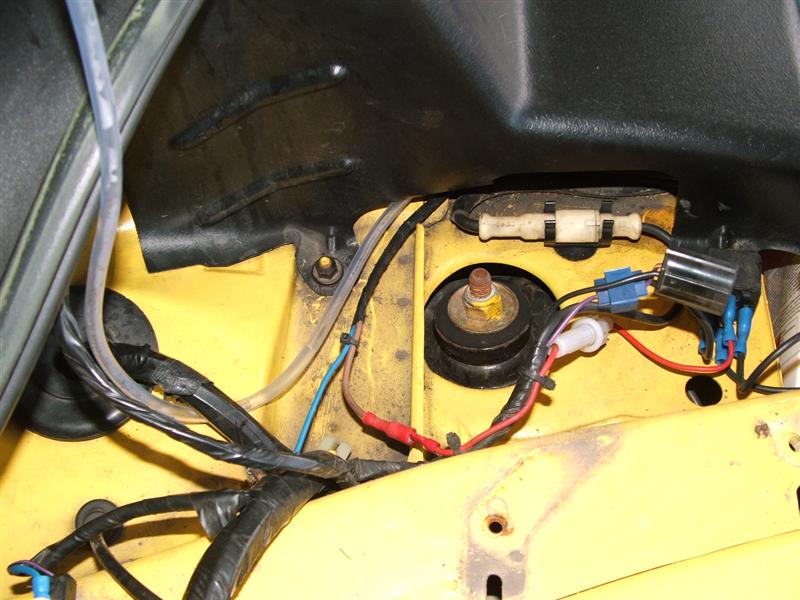
Before you start any work, disconnect the battery as you will have to remove the
ECU.
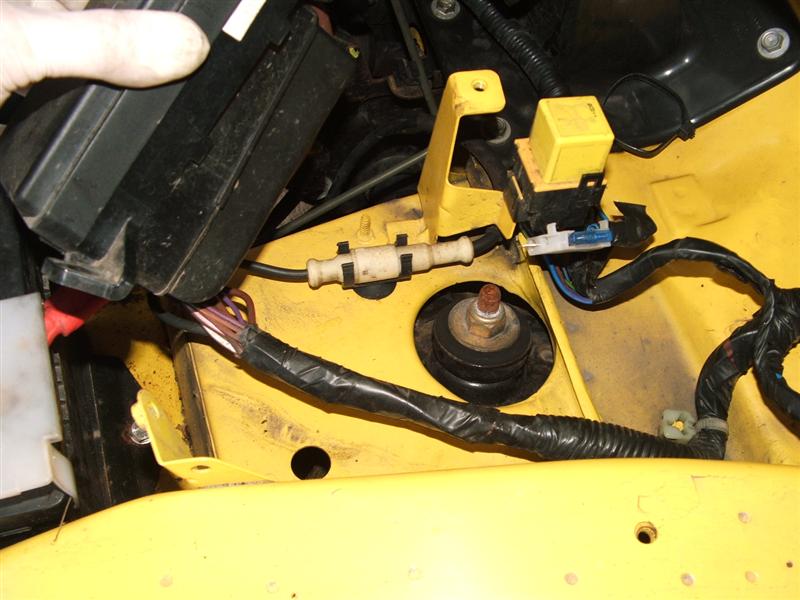
Now the hard stuff. To change the rears you have to move the expansion tank
to one side, this is just 2 bolts, pull the tank up to disengage the peg on the
underside of the tank. Once out of the way (sort of!!), the area looks like this
-
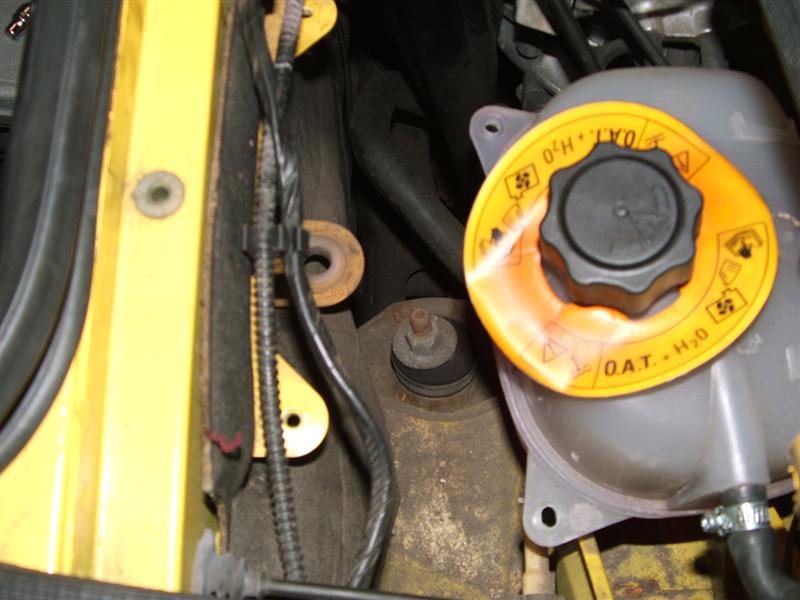 , as
you can see, not a lot of room to work in!!!.
, as
you can see, not a lot of room to work in!!!.
You also have to remove the ECU. Remove two bolts at the top of the ECU, one
either side, pull the ECU up to disengage from the bottom support bracket. On
the back of ECU are two multiplugs, these can be removed by pushing a central
clip towards the ECU and pulling the multiplug up. There are two plugs to the
side of the ECU to remove. I should have taken photo's for these really.
Starting with the top one, pull the clip at the top of the plug up quite a way,
and pull the plug away. The bottom plug is similar but the clip is on the bottom
and tricky to get at. There is also a metal bracket that the O2 sensor multiplug
fixes to that should be removed, the nut on mine didn't want to leave the fixed
bolt so it sheared off, fortunately leaving just enough to get a nut on. Once
all that is out the way the area looks like this -
 , a bit
more room than the off side, but not a great deal.
, a bit
more room than the off side, but not a great deal.
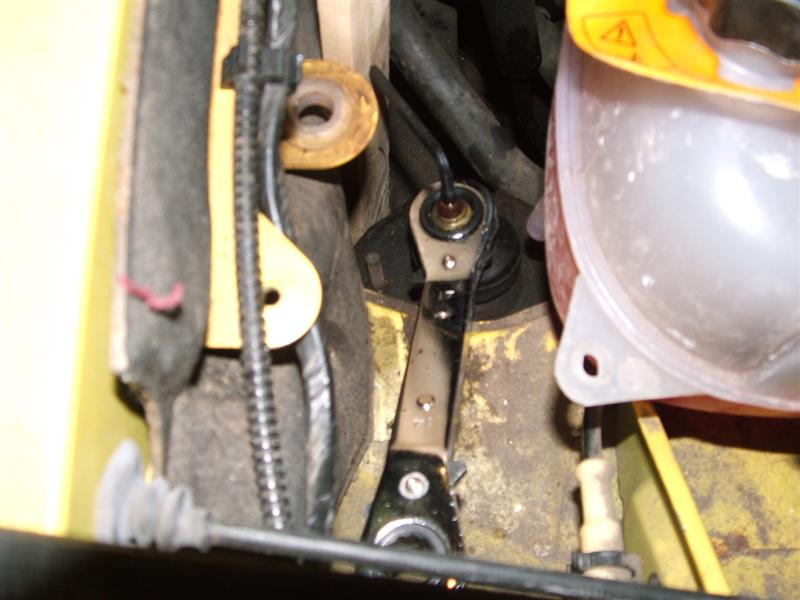
For the rear top nuts I found this kind of ratchet ring spanner invaluable -
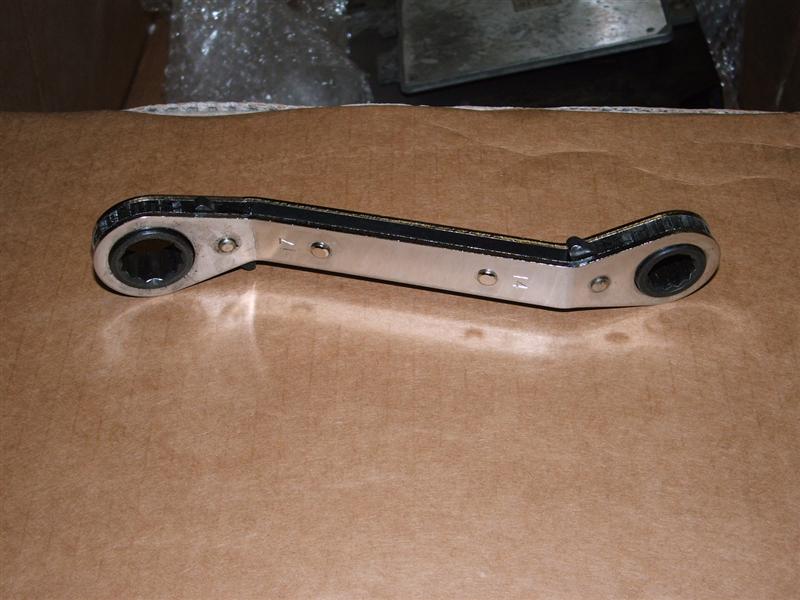 ,
particularly having the angled ends.
,
particularly having the angled ends.
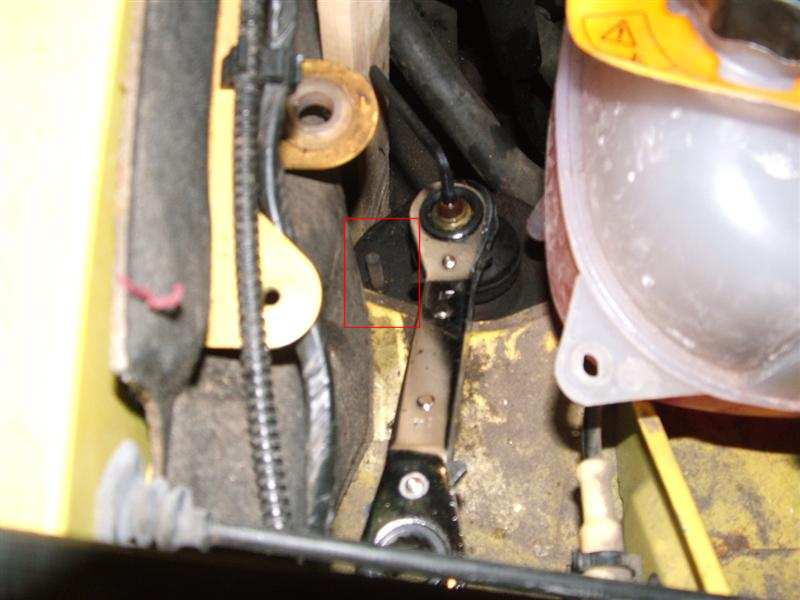
Note which hole in the sub frame the peg on the spring seat is located in,
its highlighted in this photo -
Next is the bottom bolts. Support the rear on axle stands and remove the road wheels.
Before you can remove the dampers you need to swing the anti roll bar out of the way. Remove the bolt at each end of of the ARB to ARB drop links and then swing the ARB up as far as it will go, this gives just enough room to remove the damper.
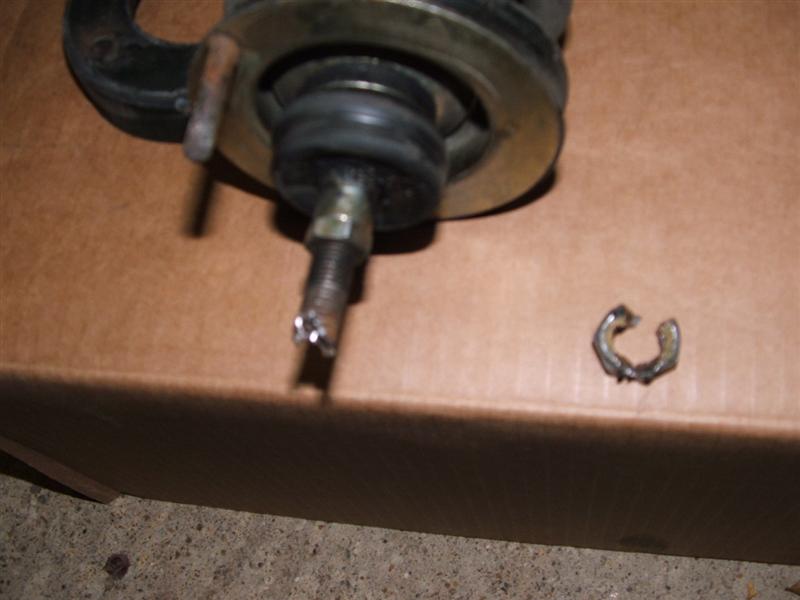
So to removing the top nuts. To stop the damper stem from rotating you need a
5mm Allen key in the stem top, the following photo shows the Allen key stopped
up against strip of wood -
 . To
start the nut off I used a length of wood as a lever. This nut was an absolute
bugger, I got it as far as the stem top and then it refused to go any further, a
combination of drilling, two nut splitters (both of which I stripped the threads
on !!) and lastly a good old fashioned cold chisel saw the nut come away, it
also buggered the top of the stem, but being as this damper already had a
rattling bottom mount, I wasn't too bothered, the aftermath can be seen here -
. To
start the nut off I used a length of wood as a lever. This nut was an absolute
bugger, I got it as far as the stem top and then it refused to go any further, a
combination of drilling, two nut splitters (both of which I stripped the threads
on !!) and lastly a good old fashioned cold chisel saw the nut come away, it
also buggered the top of the stem, but being as this damper already had a
rattling bottom mount, I wasn't too bothered, the aftermath can be seen here -
 . When
the nut is removed, remove the large washer that is under it.
. When
the nut is removed, remove the large washer that is under it.
The bottom bolt is straight forward, but you would be better off with a breaker
bar to start it off as its torqued to 100Nm. I placed a trolley jack under the
hub to take the weight off the damper prior to removal of the bolt. The bottom
damper mount is located in a machined recess in the suspension arm, this is a
tight fit and with the bolt removed it will need some 'assistance' to come away,
my assistant was a piece of wood and lump hammer!. Once the damper is free it
can be removed, trust me, there is room but it takes a bit of trial and error to
find the path. The following photo shows the off side damper removed -
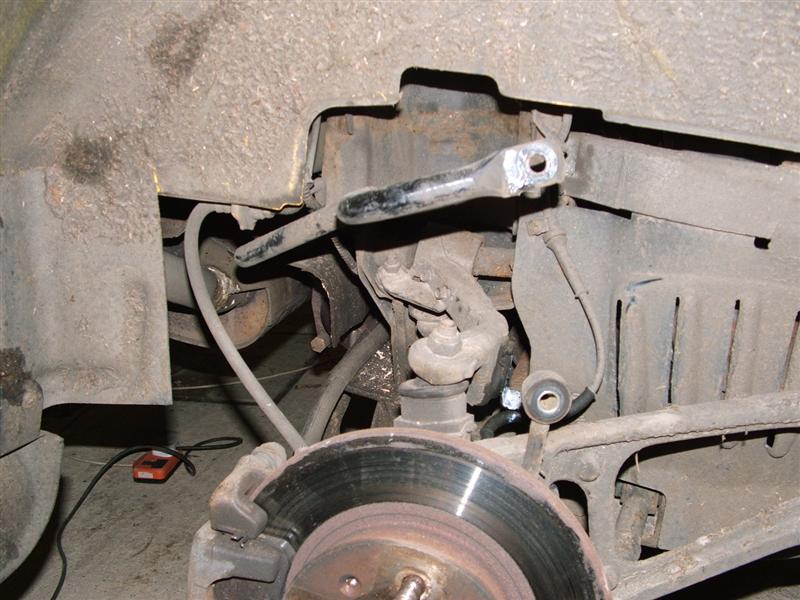 .
Retrieve the rubber bush left behind in the top side of the upper top mount.
.
Retrieve the rubber bush left behind in the top side of the upper top mount.
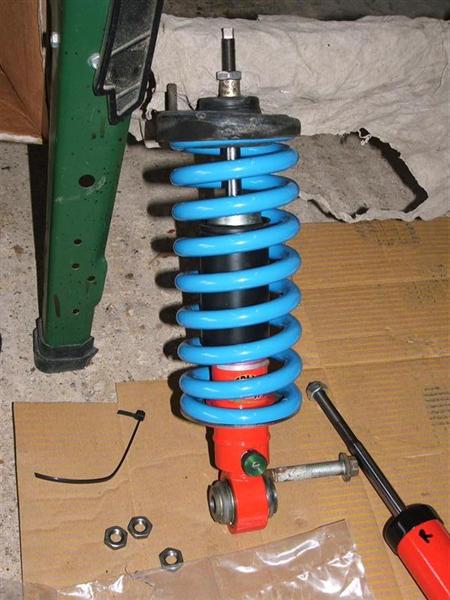
The old damper has to be stripped down to rob parts for the new damper.
Before you undo the spring retaining nut I'd advise fitting a pair of coil
spring compressors, you can get away with the rears, but not the fronts.
Remove the top rubber isolator and progressively loosen and remove spring
retainer nut, distance piece, flat washer, steel cup washer and spring retainer.
Remove the spring, dust shield and rebound rubber bush from damper shaft.
The following photo shows the component parts of the front damper (rear is
similar) -
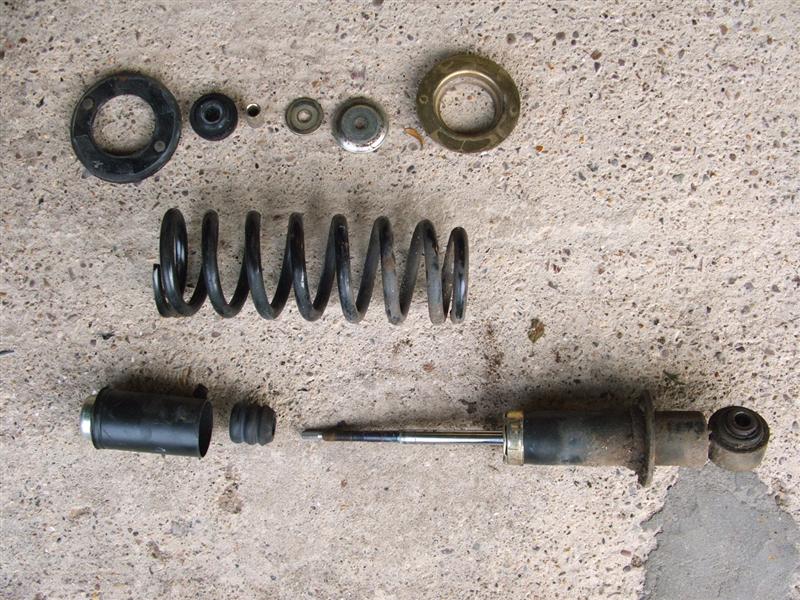 , all
parts are reused apart from the damper, spring, spring retaining nut and the top
nyloc nut.
, all
parts are reused apart from the damper, spring, spring retaining nut and the top
nyloc nut.
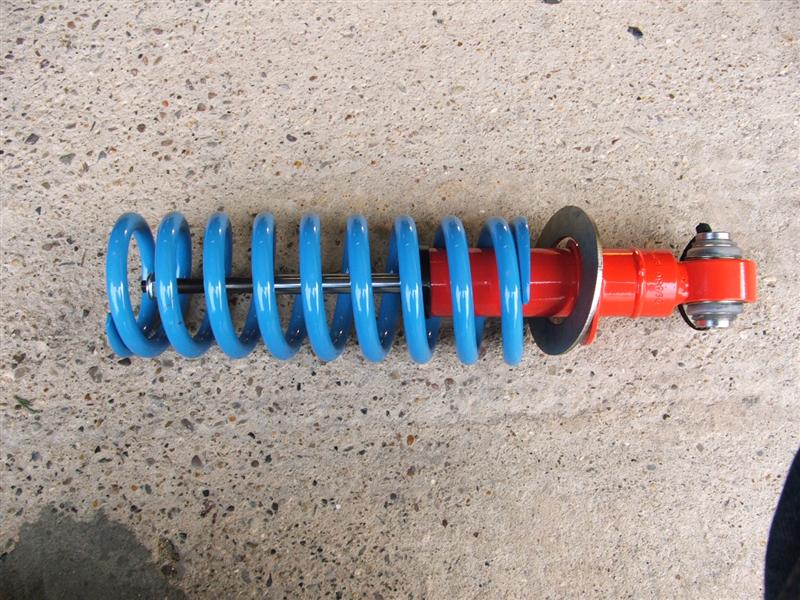
And that's it, one assembled damper which should look like this -
 . That
is the off side rear, note the spring retainer peg in relation to the damper
adjuster.
. That
is the off side rear, note the spring retainer peg in relation to the damper
adjuster.
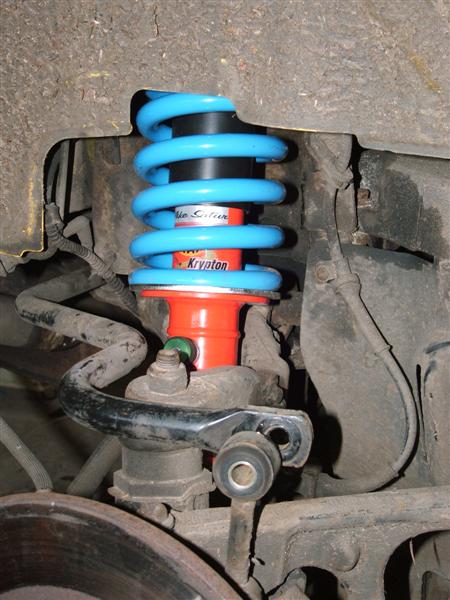
Once you've fed the damper up into the sub frame, with the damper adjuster
pointing out, from the top, place the rubber bush over the damper shaft followed
by the large washer and then screw on the new nyloc nut finger tight. Cut the
tie wrap that secures two stepped steel bushes from the bottom mount, line up
the steel bush with the recess in the suspension arm (you may need to jack up
the hub a tad to achieve this). Pass a new bottom bolt through the damper bottom
mount and into the suspension arm and tighten to 100Nm. With a 5mm Allen key in
the top of the damper, tighten the top nyloc nut to 45Nm. Job done....
 . Once
you have fitted the other damper, refit both ARB bolts to the drop links but do
not tighten them. Place a jack under the hub and raise the hub to load the
suspension, tighten the ARB bolt to 35Nm. Repeat on the other side.
. Once
you have fitted the other damper, refit both ARB bolts to the drop links but do
not tighten them. Place a jack under the hub and raise the hub to load the
suspension, tighten the ARB bolt to 35Nm. Repeat on the other side.
Refit the ECU and expansion tank in true Haynes stylee.
To remove the front dampers you have to remove the fuse box and horn(s).
Simple enough, the fuse box is held with two bolts, the horn(s) with one bolt.
Once they are out of the way, removal is pretty much as the rears, except you
have loads more working room......
Stripping and assembly is pretty much as the rears, except there is no peg on the spring retainer to worry about, and make sure you fit coil spring compressors prior to undoing the spring retaining nut, they will also have to be used when assembling the new damper.
When fitting the new dampers, all torque settings are as the rears.