First
thing to do is remove the hood from the front of the frame. If you want
to keep the hood, it's a bit harder to do. If you don't care, then snip
away or cut the material with a stanley knife along the top edge where
it meets the windscreen. If you want to save it, you need to be
careful. First remove the front hood clamps using an allen key to take
out the three bolts. Put the clamps somewhere safe with the bolts.
Next, you need to prise off the c section plastic from the front edge
as shown in Figure 1. |
|||||
 |
|||||
Figure 1 |
|||||
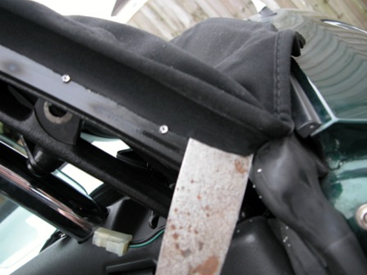
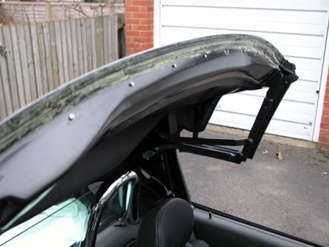
Remove
the vinyl cover over the metal of the front bow. This is a bit awkward
as it will be stuck down with glue. I used a wallpaper stripper pallet
knife to get under it. There are little metal clips retaining the vinyl
to the front bow, you will need to flick these off with a flat head
screwdriver. Take care as they are sharp. Put the c-section, clips and
vinyl to one side. You will now see that the hood fabric is attached by
it being folded over the front bow, and held in place at the corners
with steel clips pressed out of the metal of the front bow, and then
the fabric riveted along the front bow. Figure 2 shows the fabric after
removal from the front bow by drilling the rivets out with a 7mm drill
bit. The corners were extracted by bending the metal clips outward and
working the material over them. |
|||||
 |
|||||
Figure 2 |
|||||
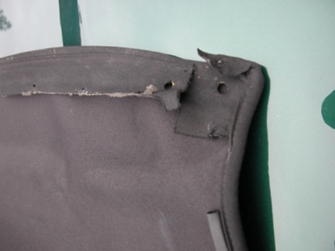
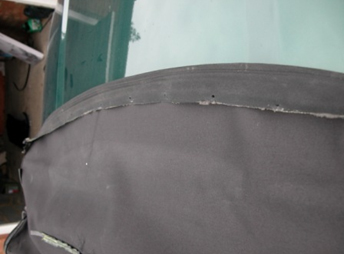
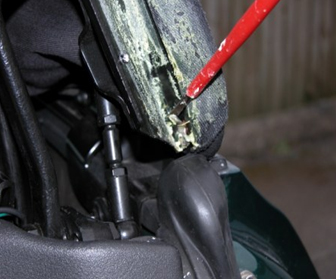
There
is also a piece of rubber over the corners as shown in Figure 3. This
is held in by a plastic dowel which can be pushed out. Don't drill it
out (as I did) becuase you don't get new ones in the kit!! BAS
International very kindly gave me two new ones. |
|||||
 |
|||||
Figure 3 |
|||||
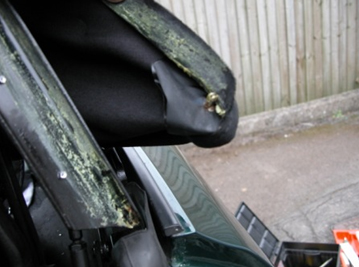
Figure
3 shows this rubber thing, but you can see that I have also drilled out
the rivets and prised the hood fabric off the bow also. Figure 4 shows
the whole of the front bow with the rivets drilled out. At this point I
had only drilled off the tops of the rivets using a 7mm drill bit. To
remove the rest of the rivet I switched to a 3.2mm (1/8 th will do)
drill bit, and carefully cleared out the holes. The problem here is
that you end up with the ends of the rivets in the hollow front bow.
They rattle around when you go round corners! There are various
solutions to this, in time they will fall out under hard cornering, or
you can catch them in some mastic or expanding foam squirted into the
hollow front bow. |
|||||
 |
|||||
Figure 4 |
|||||
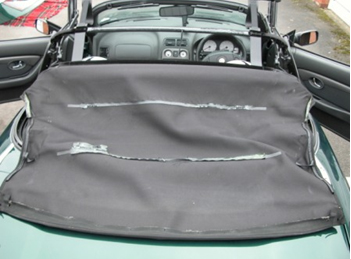
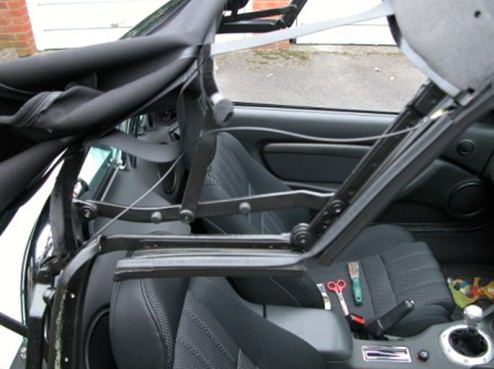
You
will see that there are cables threaded through the edge of the hood on
each side above the door window seals. These are an IMPORTANT part of
the frame and must not be cut. In order to get the hood off, you need
to undo the cable at the front bow. It is held on by a loop of the
cable being hooked over a metal tongue similar to those holding the
hood fabric on at the corners. You just need to prise the tongue back
and unhook the cables from the front bow. Obviously the frame needs to
be folded back a bit to allow the cables to have some slack in them.
After sorting this out, I was able to cut the fabric around the second
an third bows to get the hood clear of these (Figure 5). |
|||||
 |
|||||
Figure 5 |
|||||
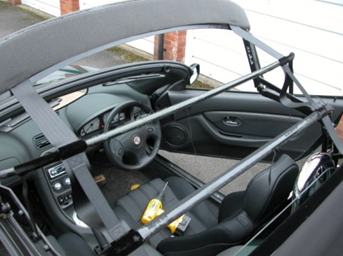
Figure 6 shows the remains of the hood fabric after this was done, and Figure 7 shows the frame at this point. |
|||||
 |
 |
||||
Figure 6 |
Figure 7 |
||||
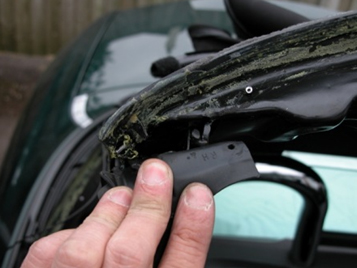
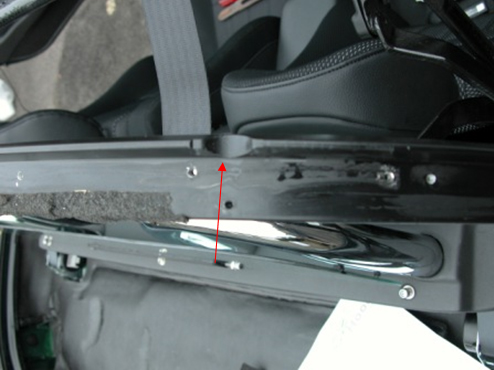
| In Figure 8 you can see that the cable is threaded through a hole in the front bow (red arrow) you need to pull the cable out through this, in order to thread the cable back through the new hood. | |||||
 |
||
Figure 8 |
||
 |
 |
|
Figure 9 |
Figure 10 |
|
 |
|
|
Figure 11 |
Figure 12 |
|
 |
 |
|
Figure 13 |
Figure 14 |
|
 |
||
Figure 15 |
||
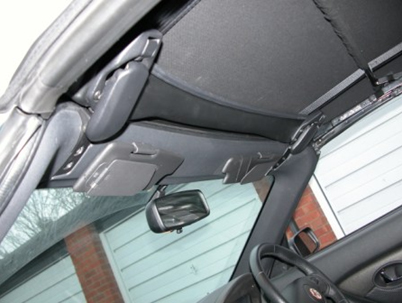
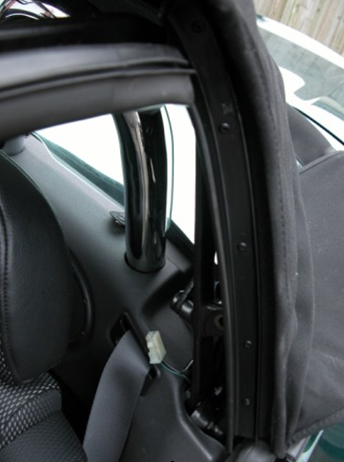
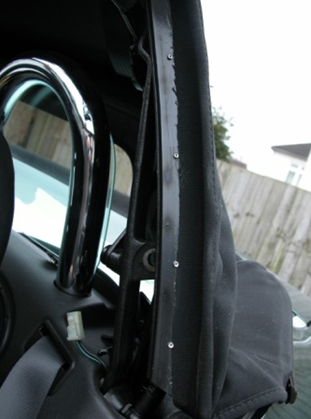
Moving
to the side bars behind the side windows, you will see a rubber seal
(Figure 9) slide this down towards the ground. to pull it out. It can
be a little stiff, but it is greased, so should slide out of the
plastic retainer (Figure 10). You might have to move the frame forward
or back to get the best grip on it. You will find after you remove the
rubber seal that the plastic retainer is riveted in place ( Figure 9).
You will need to carefully drill these rivets out. This will remove the
plastic retainer. You are advised to put the seal back onto the
retainer it came from to avoid getting them mixed up! Put it safely to
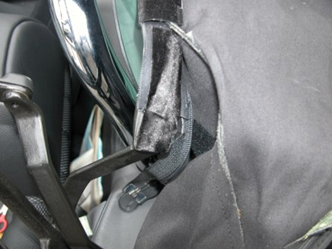
one side. Next, you need to prise off the hood fabric which has been
glued in place. The fabric is bonded to plastic here, and the fabric
and plastic should come off together. (Figure 11). I found a wallpaper
stripper pallet knife the best for this as shown in Figure 12. You will
also find a butterfly clip holding the fabric onto the side bar at the
bottom (Figure 13) you will need to prise this off with a screw driver
(Figure 14) then the hood is clear (Figure 15) up to the T-bar! |
||
When
you have done both sides, all that is left to do with regard to removal
is get the rear screen section off. To do this, first get some dust
sheets to protect the car and the screen. |
||
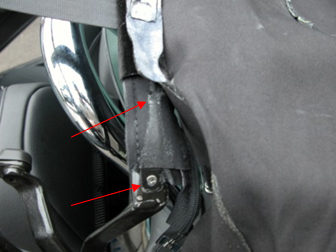
Move
to the rear bow. This is the one that has a clamp to retain the zipper
for the rear screen at the top. First you peel back the sticky backed
felt. (Figure 16). This will reveal two philips head screws (red arrows
in Figure 17). Undo these to release one side of the back bow retaining
clamp. Next you will need to undo all the bolts that hold the retaining
clamp to the back bow. A socket set will be required here due to the
shape of the bow and the recessed nature of the nuts. Feel underneath
the back bow, and you will find recessed holes. Inside these holes are
the nuts that hold the clamp bolts in place. Undo these one by one and
the retaining clamp will come off as shown in Figure 18. |
||
 |
 |
|
Figure 16 |
Figure 17 |
|
 |
||
Figure 18 |
||
The
last stage of hood removal is removing the hood fabric from the rear
clamping bar. The rear clamping bar is held in place with 5 clasps,
which hide under the parcel shelf carpet. Remove the carpet, but you
can leave the noise deadening foam under it in place. Sometimes however
the carpet is glued to the foam. Release all the clasps and fold the
rear clamping bar forwards towards the front of the car. Place your
dust sheet over the car bodywork as this bit gets messy! |
||
Surounding
the rear clamping bar is a metal strip which clamps the hood fabric
down. This is pop riveted along its length. The strip is sometimes
covered with sticky back foam stuff which you have to peel off. I found
it easier to just feel for the rivets, scrape the foam away from around
the rivet and drill it out. Again use a 7mm to drill the head off, and
a 3.2mm drill bit to clear the hole. |
||
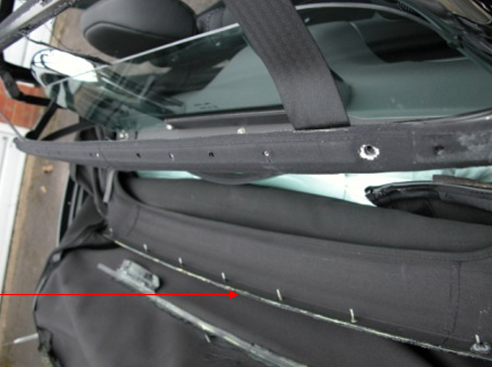
| When you have drilled out all the rivets, remove the metal clamp, and then the hood will be free to lift clear from the car. Figure 19 shows the rear clamping bar raised to 90º. Behind it you can see the parcel shelf and T-bar. The notch you can see (red arrow) will be important later when I get round to the fitting section. | ||
 |
||
Figure 19 |
||
| Images and Text © 2006 Iain Ross | I accept NO responsibility if you attempt any of the mods on this site. If you mess it up - its your fault! |
||