A Car Called Bob... Hood Replacement
Removing the Frame from the car
Removing The Frame Is Easy - the hoops are a bit harder!
How I did it...
To get to the bolts that hold the frame to the car chassis, the first thing to do is to undo the T Bar trim. This is the bit of trim that runs the width of the car behind the seats, and has the rear speaker covers mounted in it on the TF.

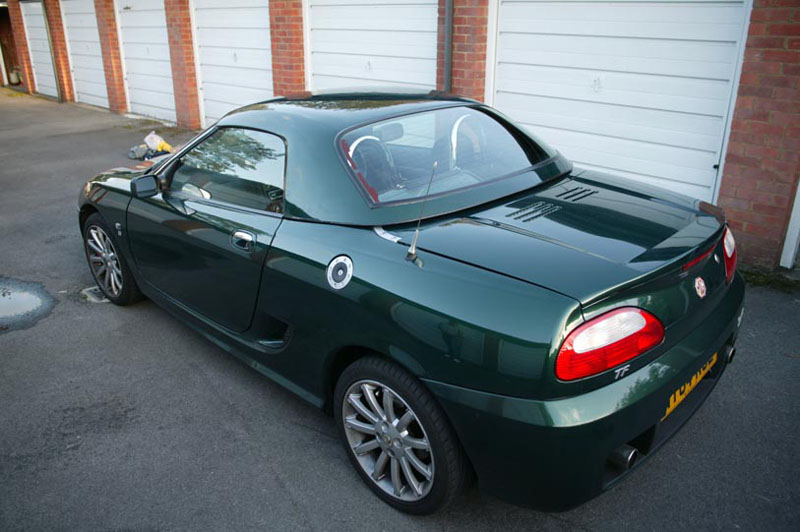
The shot on the left was actually taken after I had removed the hood, and refitted the hoops but you can see the three studs on the T Bar trim, one on the centre, and one on each side.
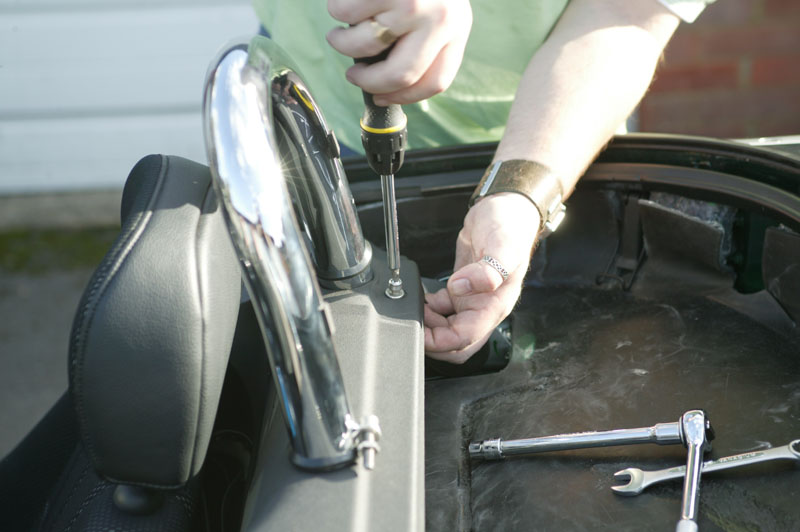
The studs simply unscrew with a posi-drive screwdriver. You can then remove them and put them in a safe place. In the next photo you can see my friend Chris removing the off side stud.
If you don't have hoops fitted, all you need to do to pull the trim away enough to access the bolts that hold the frame on, is release the trim clips . First pull the seats forward. Then a sharp tug on the trim by where the seatbelts poke out of the trim slightly up and towards the front of the car will release them. Sometimes the trim clips snap, but I haven't had this problem yet. When both sides have been released, grab the trim just by the upper cubby hole (the one that pulls down to open) and give that a tug. The whole trim will slide forward as can be seen in later photos.
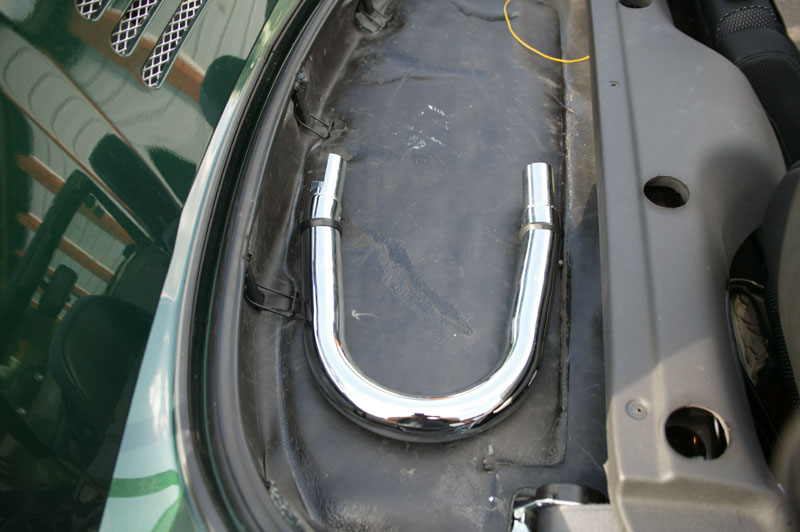
In order to get the trim off when you have MS Boxer hoops fitted you need to remove the hoops. This is a bit more difficult.
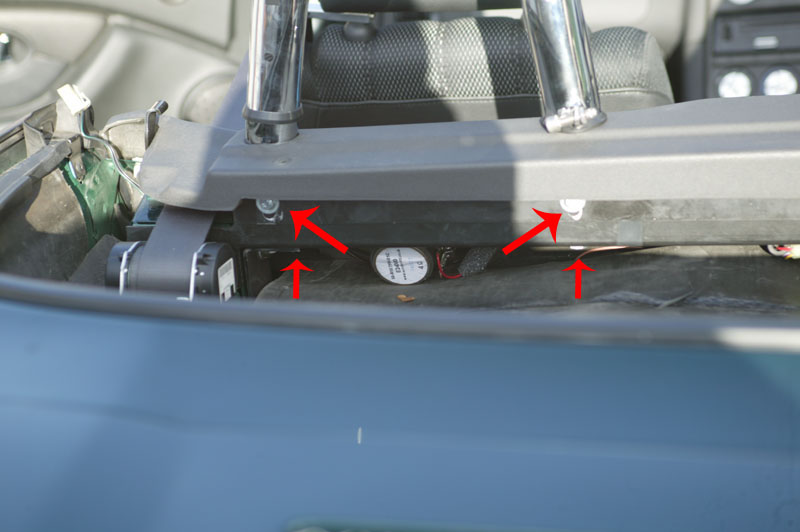
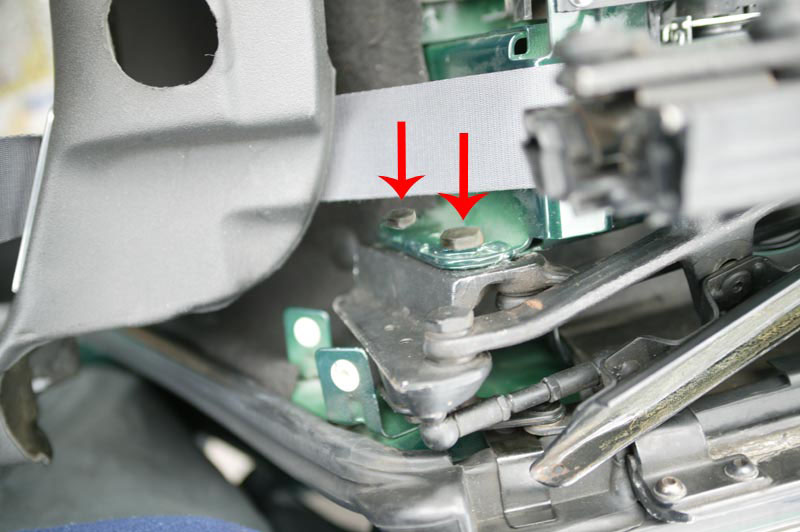
There are two stages to this. First the top two screws marked with an arrow have to be removed. The head size is 10 mm (IIRC). There are four in total, two per hoop. They screw into the hoops, and secure a piece of right angle steel that contains the holes that the Studs screw into .
The second stage is the removal of the two bolts that secure the hoops. The inside bolt head is 17 mm and the outside bolt is 13 mm. The are a pair of outside bolts, the inside one is the one you need to remove, the other secures a bracket, and you need not remove this.
With the hoops removed, the T Bar trim will slide forward. Its still attached to the car by the seatbelt. You don't need to remove the trim completely, so leave the seatbelts alone.
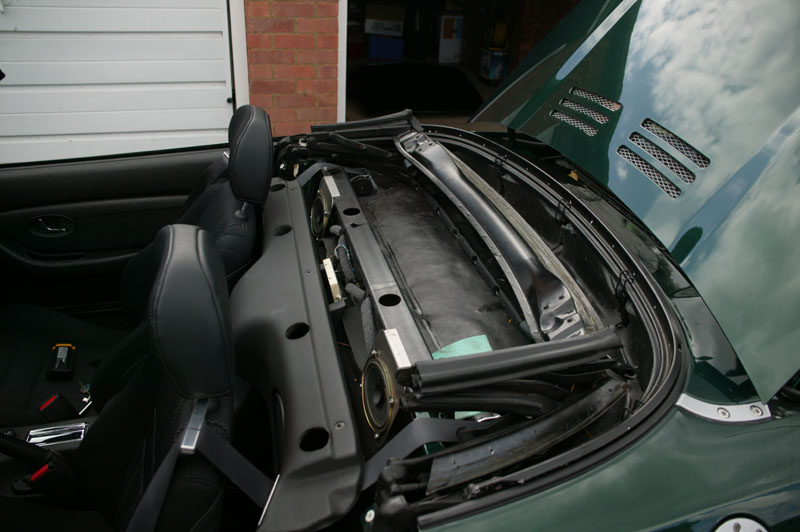
Here is a shot of the T Bar trim off the car, and slid forwards. Underneath is the T Bar, complete with holes for the Boxer Mk 3 hoops. The frame on the car at this point is my new (old) MGF frame, which I had just put on at the time when the photo was taken!
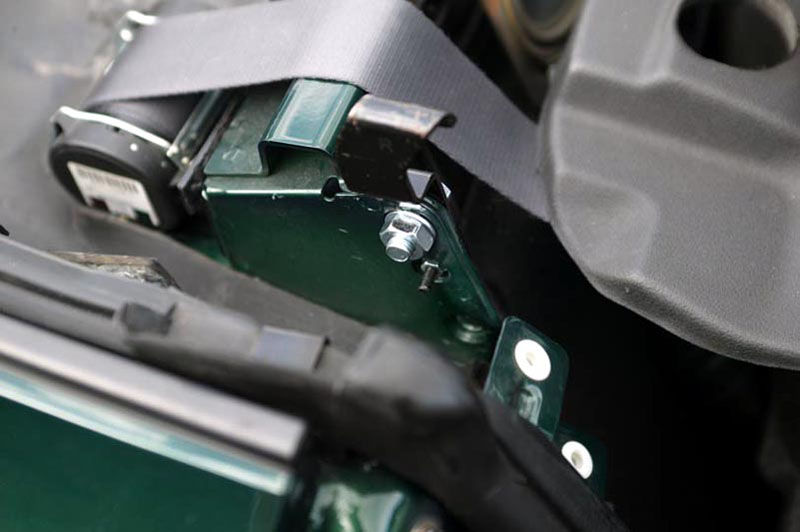
Looking down here on the nearside, you can see where the frame bolts to the chassis. The two bolts are marked in the photo by a red arrow. They are M10 bolts (13 mm heads IRRC) and they screw into threaded holes on the frame itself.
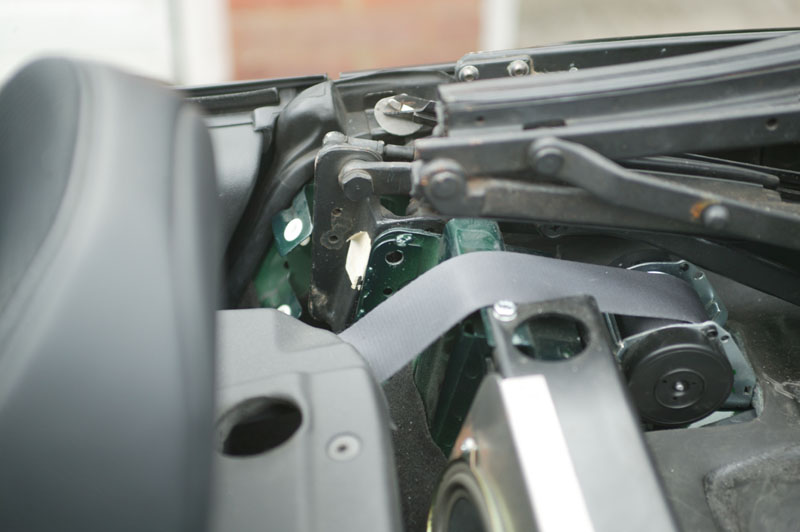
This is a shot that shows where the offside frame bolts go. They have been removed in this photo. You can also see the speaker brackets that Mike Satur fits to attach the rear speakers to the modified T Bar he fits with the hoops.
Once the bolts are out, two people can simply lift the hood frame off the car.
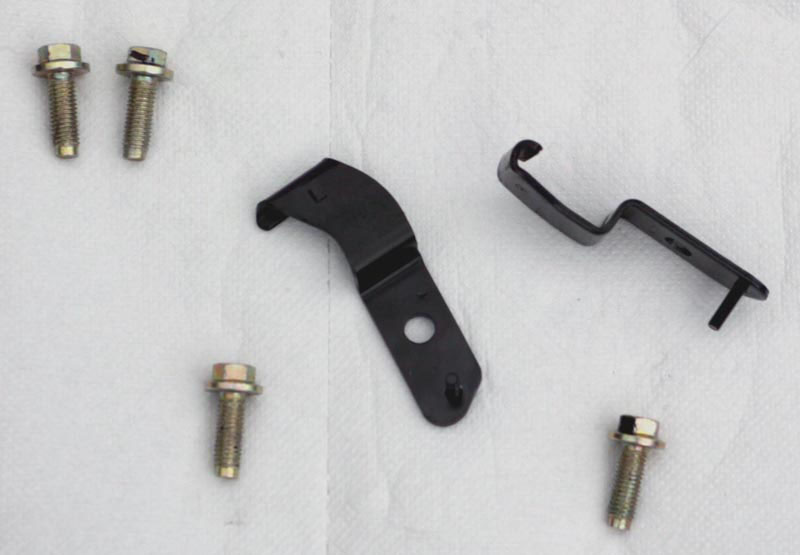
A shot of the four frame bolts, and the two hard top catches. These are bolted to the hood frame. The M5 stud you can see at the bottom of the catches wasn't actually secured to anything on my car. Not sure whether it should have been! In any case, I got some nuts and washers for them anyway.
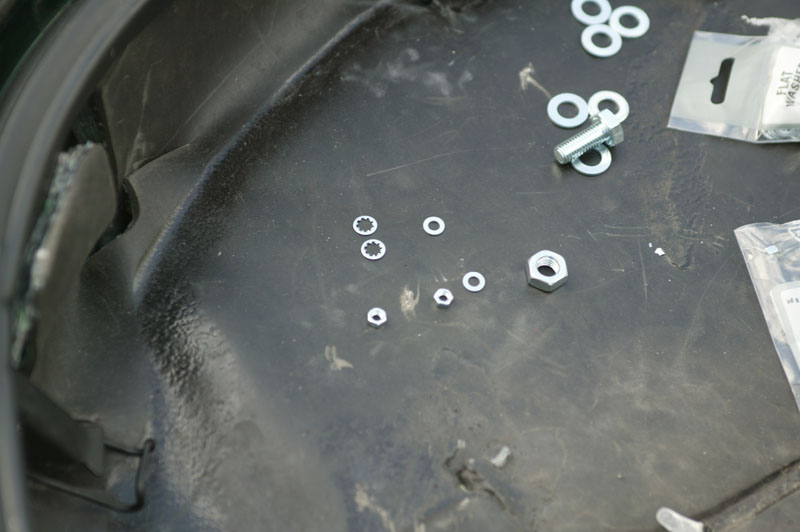
Lurking on the sound deadening foam, are the bolts I bought to secure the hard top catches to the car. I decided not to use the original gold bolts but got some new ones from B&Q. I also bought washers and nuts, shake-proof washers and flat washers for the M5 stud on the catches.
Here you can see the hard top clips bolted in place. I can now put the hard top on with no frame underneath, and actually use my parcel shelf! Incidentally if anyone is wondering, I hung the BAS hood where the hard top was.
Tidying up the trim around the hoops
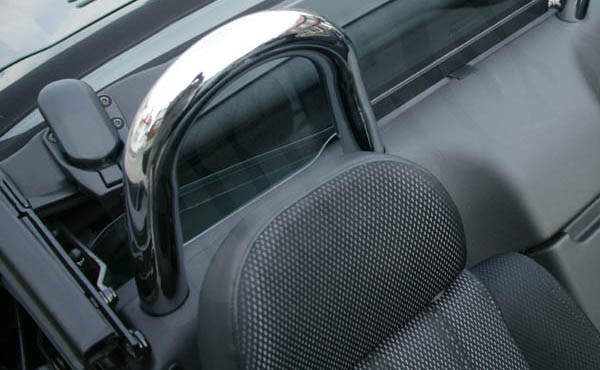
The only thing I didn't really like about the MS hoops was that there was no finishing trim around the hoops, as you can see on the photo on the left. It looked well... unfinished.
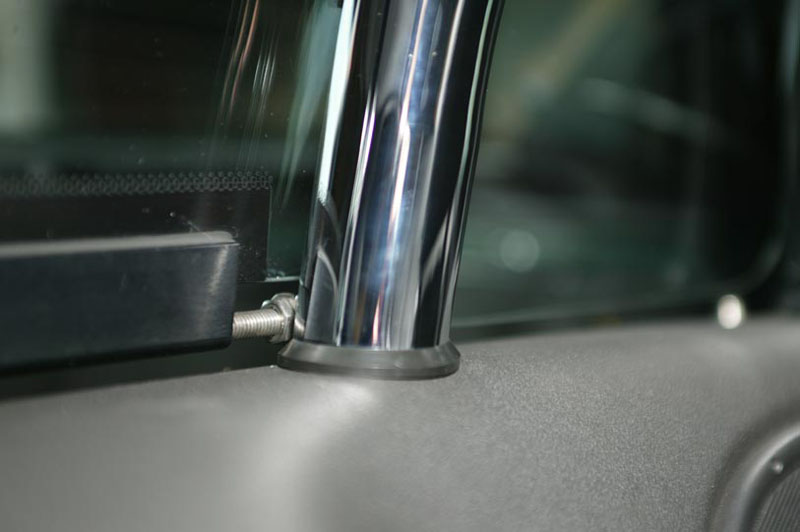
A suggestion made by someone on the forums was to implement what Tony Thompson had suggested on his site, apttony.co.uk. I used 1 1/2" trap washers from B&Q at about £1 each, they finish off the hoops a treat. Thanks Tony! Check out his site - its an excellent resource.
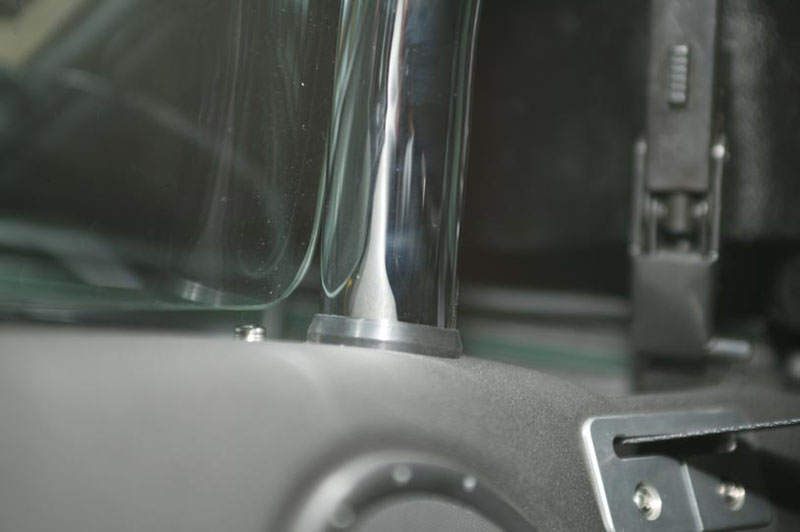
An alternative shot of the hoop trim, and you can also see the brushed aluminum seatbelt escutcheons from Mike Satur.

| Images and Text © 2006 Iain Ross |
I accept NO responsibility if you attempt any of the mods on this site. If you mess it up - its your fault!