Changing The Lighting - Instrument Pack |
| | Heater Controls | Clock / Oil Temp Gauges | Instrument Pack | Switches | Head Unit | |
|
The
TF instrument pack (the part that contains the rev counter and speedo)
is front illuminated with orange lights. In this section I show you how
change the lighting to the colour of your choice. I go further than
just showing you how to change the lighting, I also show you how to
remove the instrument pack completely. |
| |
Before
undertaking this work disconnect the battery and wait for half an hour
or so for the electrics to discharge. It would be a bit annoying if you
knock something and set your airbags off! |
| |
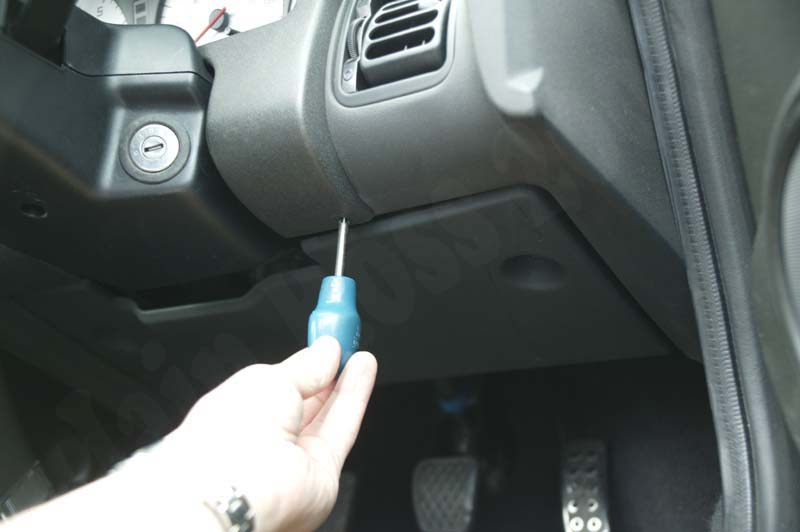
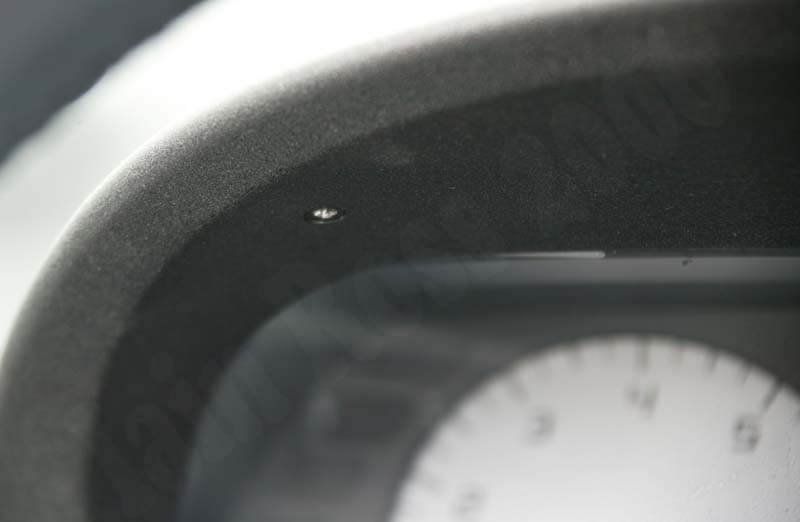
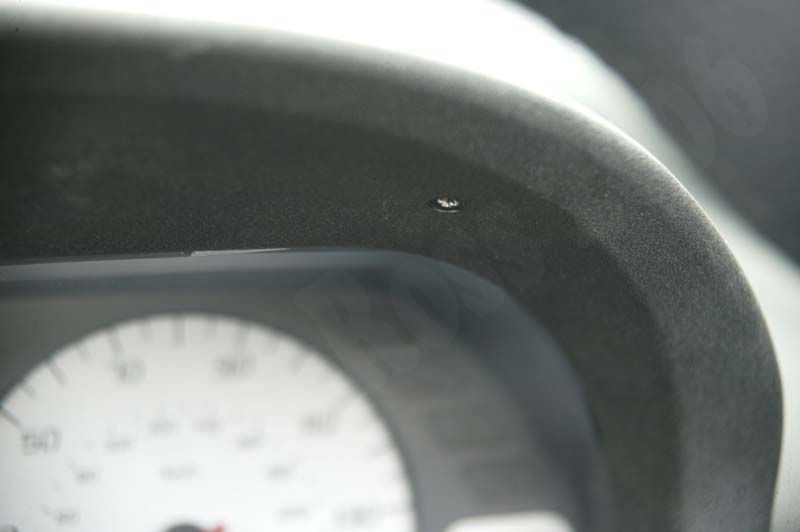
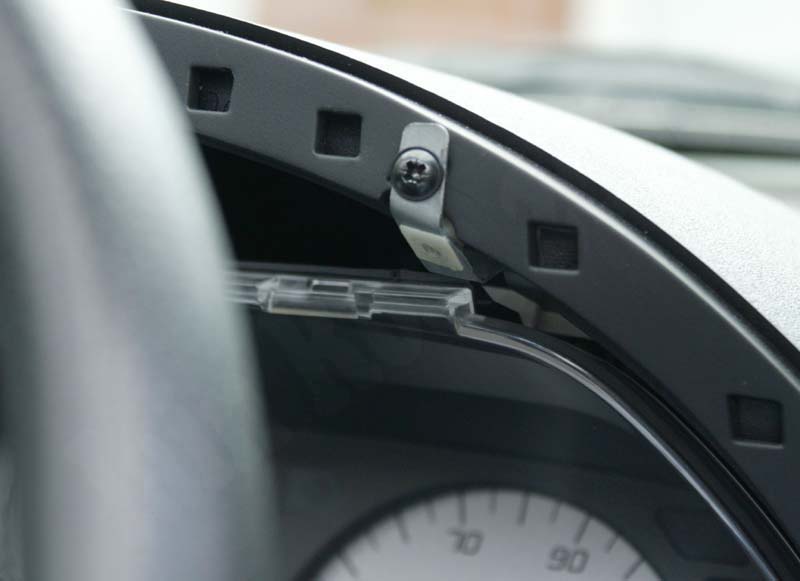
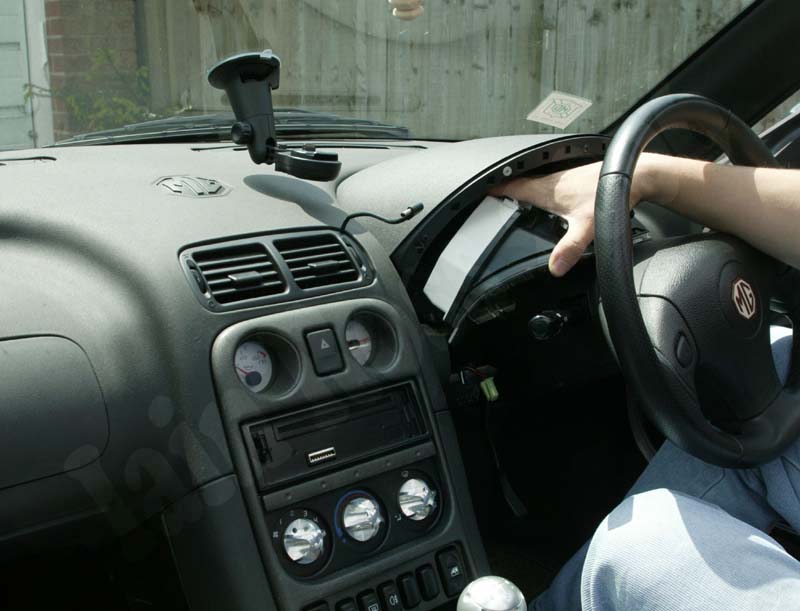
The
first stage is to remove the cowl around the instrument pack. This is
held in place by four philips head screws. Two are underneath the
dashboard, just in front of the fuse panel and two are above the
instrument pack on the underside. They are highlighted with a red arrow
in the thumbnails below. |
| |
|
|
|
|
| |
|
|
|
|
Unscrewing lower RHS cowl screw |
Upper LHS Cowl Screw |
Upper RHS Cowl Screw |
| |
|
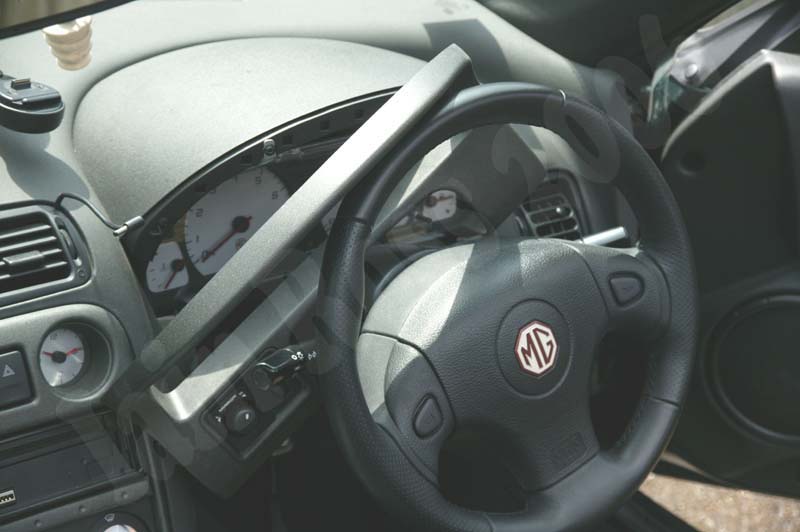
Having
undone the four screws, the cowl slides out. However, you have to lower
the steering column to its lowest position in order to pass the bottom
of the cowl over the steering column cowl. If you don't have this
adjustment, then you will have to take the steering column cowl off
too. Once the cowl has come out, disconnect the interior lighting
dimmer switch and the wing mirror adjustment switch (if you have one).
Put the cowl somewhere safe. |
|
|
|
|
| |
|
|
Sliding out the cowl |
Dimmer and Wing Mirror Adjust |
View of the back of the switches |
|
|
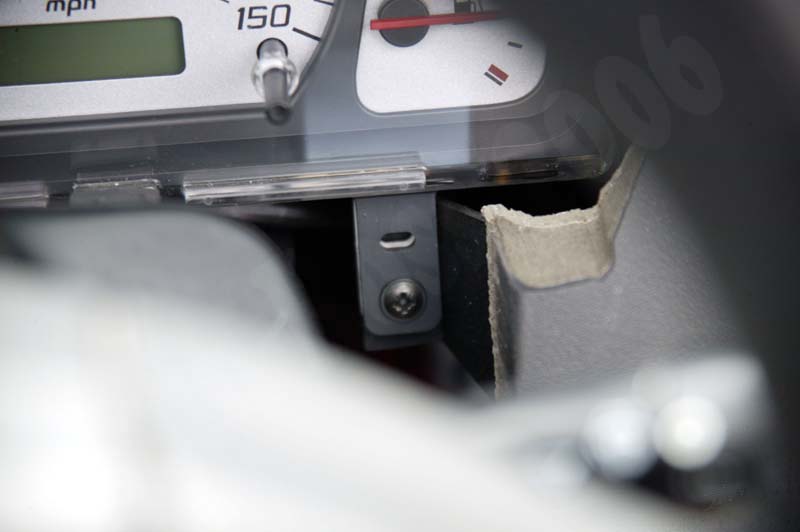
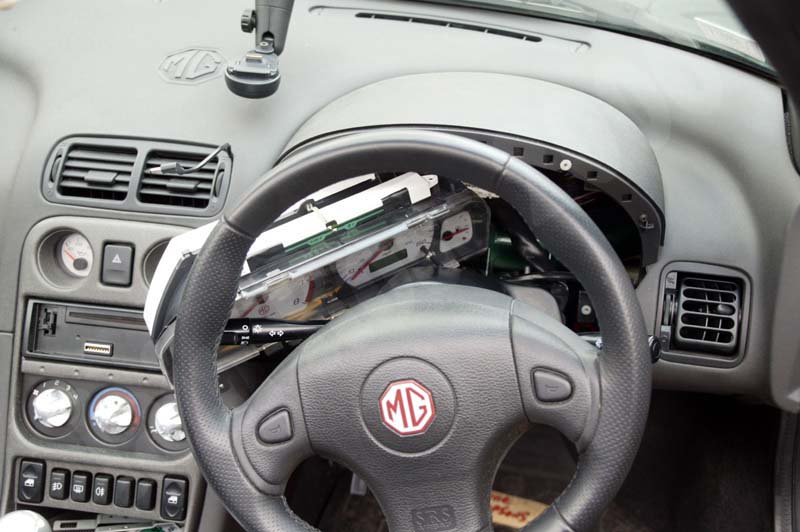
On
removing the cowl, you will see that the instrument pack is held in
place by four philips head screws. Two are on the top, clamping a metal
bracket screwed to the top of the pack, and two are on lugs at the
bottom of the pack. Carefully remove these screws. |
|
|
|
|
|
Top RHS Instrument Pack Screw |
Bottom RHS Screw |
Bottom LHS Screw |
| |
| |
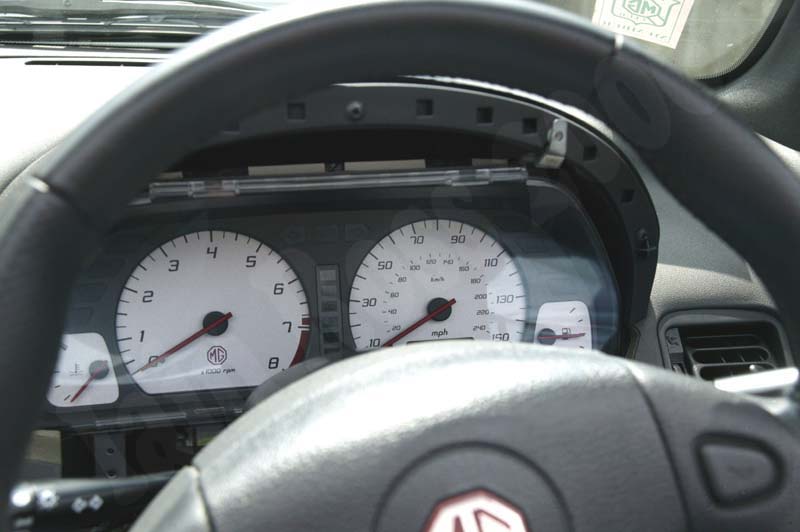
The
shot on the left below shows the pack ready to come out. The screws are
removed and put in a safe place. The shot on the right below shows the
pack pulled forward slightly and resting on the steering column.
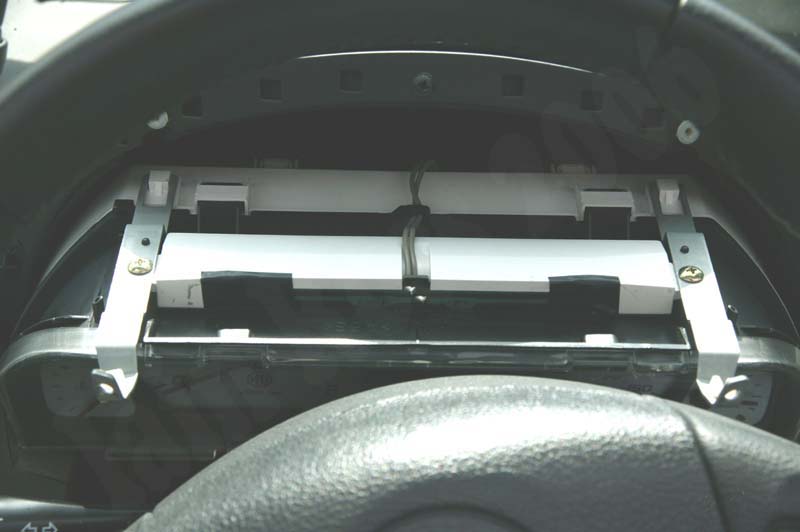
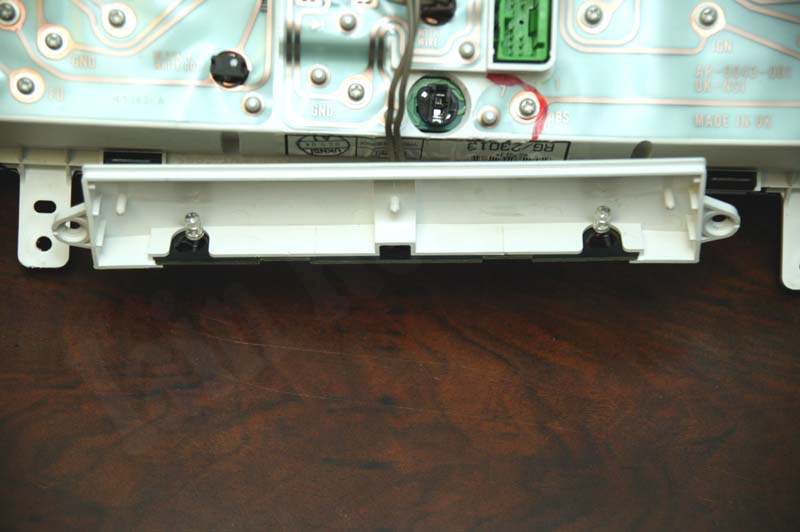
This
is as far as you need to go with pack removal to change the lighting.
You can now access the two bulbs which are seated under the black
electrical tape in the shot on the right (more about that later). As
well as changing the bulbs you will need to remove the yellow filter.
To do this, simply unscrew the two Philips screws that hold the
brackets onto the white plastic. When these are clear, the white
plastic lifts up and you can remove the filter. Replace the bulbs with
an equivalent slim wedge bulb in the colour of your choice or an LED
slim wedge bulb from ultraleds.co.uk. |
|
|
|
|
|
The pack free, and ready to remove |
|
The light box on top of the pack |
|
| |
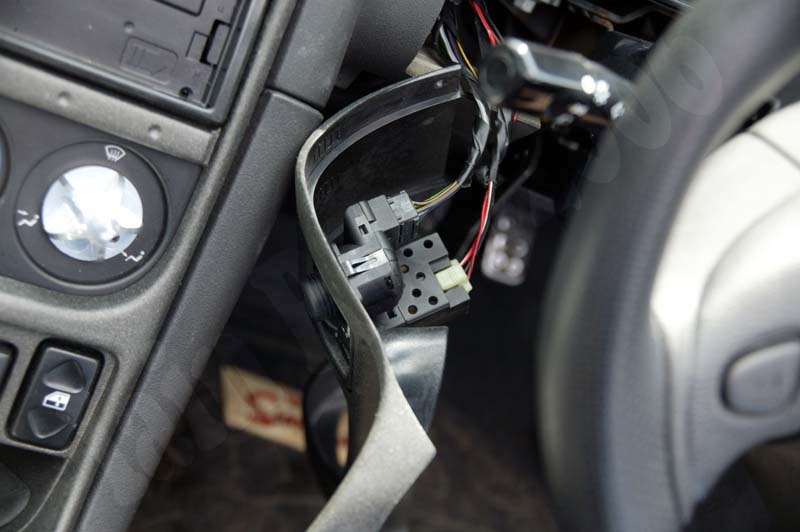
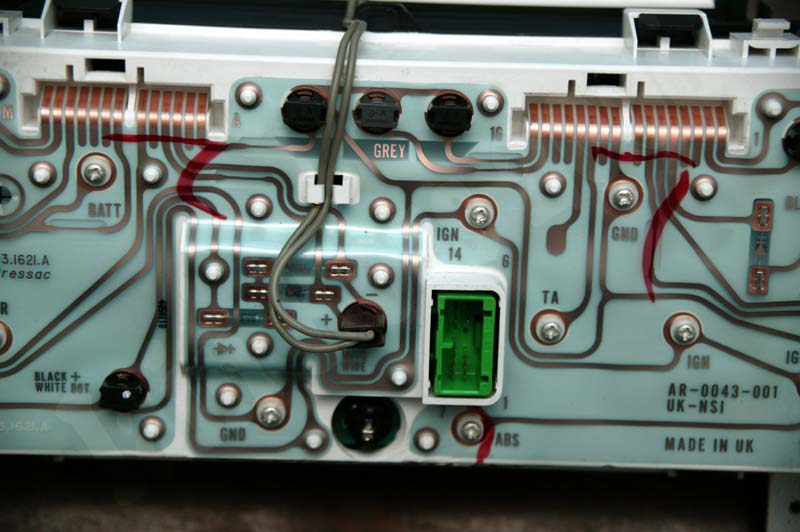
Disconnecting
the pack is quite fiddly. There are three connectors to remove. Two
white ones near the top on each side, and one small yellow one in the
middle. The are spring release clips with the spring clip in the middle
of the connector. You have to work your hand over the pack and down the
back. It helps if you move the pack to one side slightly. Once it is
free, it can be slid all the way out. |
|
|
|
|
| |
Disconnecting the pack |
Slide the pack to the side |
Ready to completely remove |
| |
| |
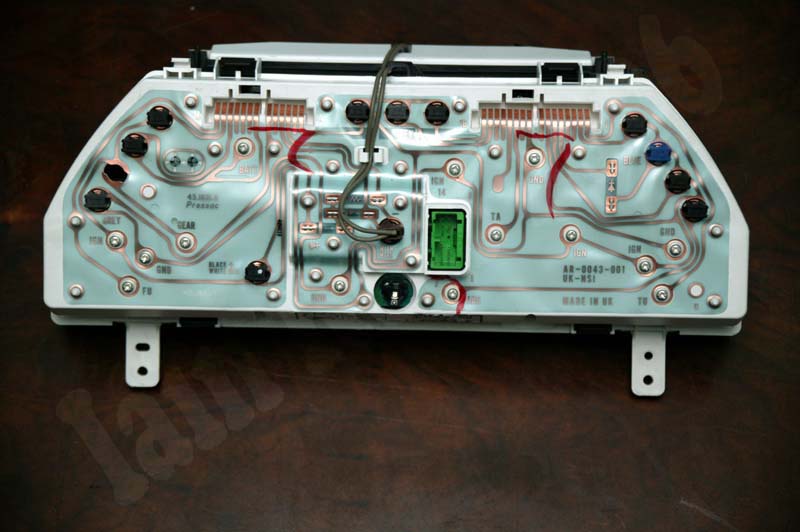
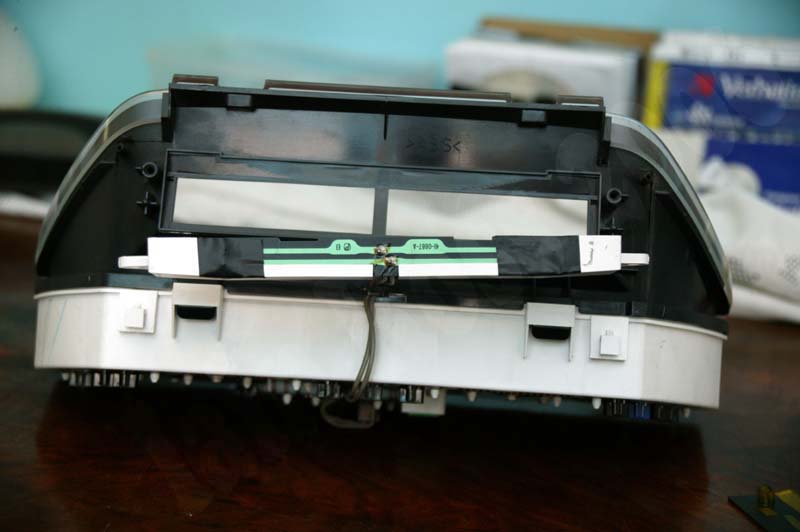
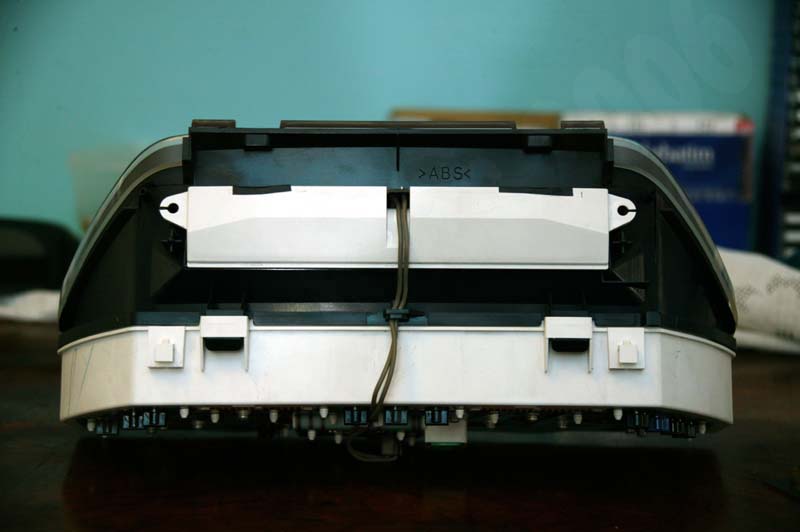
With
the pack now out, lets have a look round the back. You can see that
there are lots of bulbs for all the indicators in the instrument pack.
There is also a connector next to the green one with two grey wires
coming out. These are the wires for the dial front illumination. The
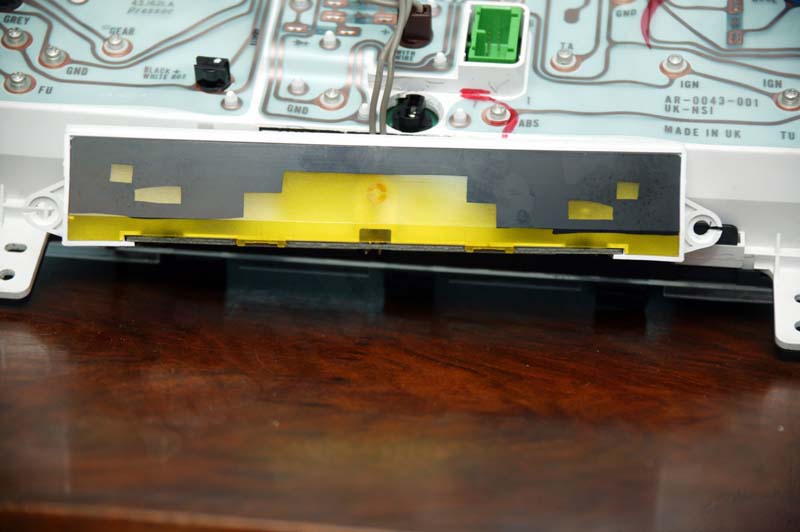
third shot below is of the lighting box removed from the pack at the
top (its held in by those two brass screws shown in the picture of the
brackets above) and dangling down. You should pop this filter off, to
avoid discolouring your new lighting colour scheme. |
| |
|
|
|
| |
Rear of the pack |
Close up of the connections |
The yellow filter |
|
|
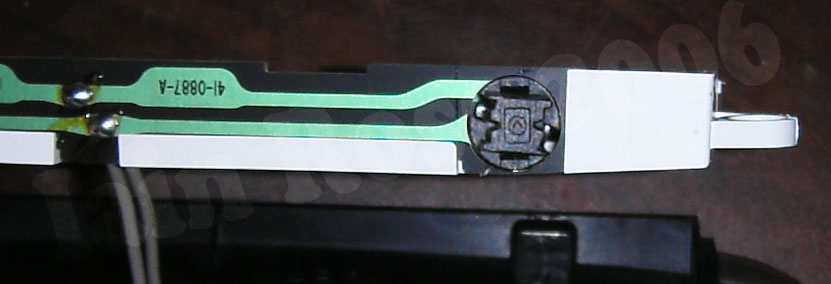
| When
I changed my lighting, I didn't know you could get direct replacements
for the slim wedge bulb, so I used normal 5mm LEDs and soldered them
onto the circuit board. The shot on the left below shows the light box
sideways on, showing the original slim wedge bulb holder in place. I
then soldered my LED/shunt resistor combo onto the contacts, and
directed the LEDs in the same direction as the original bulbs as can be
seen in the shot on the bottom right. |
|
|
|
|
|
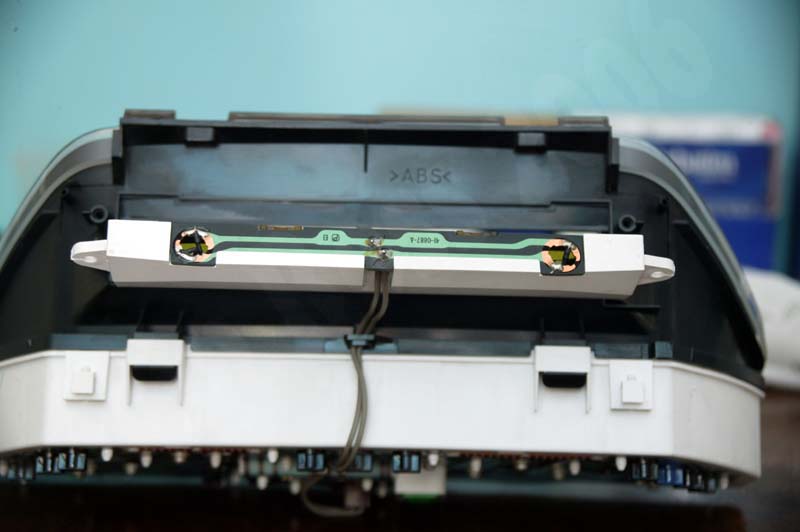
Original bulb holder |
LEDs soldered on |
LEDs aligned in the light box |
| |
| |
I
put a bit of electrical insulating tape over the solder connections for
protection, and then put the light box back on. That is essentially it,
all that remains is to put the car back together again! Its fairly
straightforward, just follow the instructions in reverse. |
| |
|
|
|
| |
Tape covering the solder |
|
Finished! |
| |
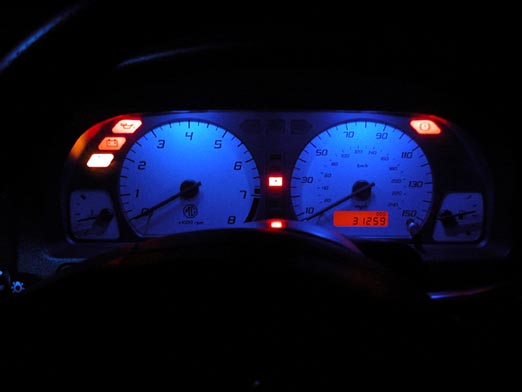
The
result is pretty stunning as already shown. However, here is another
shot of the dash lighting after conversion. Incidentally I took the
instrument pack to pieces to see if there was anyway of changing the
back lighting of the LCD screen. The simple answer is no. There is an
orange filter laminated into the LCD itself. Oh well......
|
|
|
| |
| |
| |
| |
| Images and Text © 2006 Iain Ross |
I accept NO responsibility if you attempt any of the mods on this site. If you mess it up - its your fault! |